One of the limitations of WhatsApp is that you can only use it on your phone. If you are not carrying your phone, you’re stuck without WhatsApp.
Update: WhatsApp has announced that it is available via the Desktop Browser. This guide will be updated with steps for the official desktop browser usage of WhatsApp as once it is rolled out.
There are several reasons why you’d want to use WhatsApp on a PC running Windows XP, Windows Vista, Windows 8, or Windows 8.1. Checking your phone is a distraction that you might want to avoid while working. It’s inconvenient to switch to another device just to send a couple of quick messages. And if you’ve lost your phone, then you might want a quick way to message people and let them know. No matter what your reasons are, you can run WhatsApp on a PC. Here’s how.
Note that while this guide is for WhatsApp, you can run almost any Android app using this method. Just replace the apk file in step 5, with the apk of the Android app you want to run. Here’s a good source to download apk files.
1. You’re going to need an Android emulator app to accomplish this. We’ve tried it withBluestacks App Player but it should work with any other emulator too. You’ll also need a mobile phone to verify the WhatsApp account.
2. Download Bluestacks App Player on your computer.
3. Run the setup file to install it. During installation, Bluestacks will ask for App Store Access and App Notifications. You can uncheck both while installing.
4. Wait for the installation to finish (it takes several minutes). During the final stages of installation, Bluestacks will run in full-screen mode. Tap the diagonal line icon on the top-right to run it in windowed mode. This makes the next few steps easy.
5. Leave Bluestacks App Player running and go to your browser. Download theWhatsApp apk file.
6. Double-click the WhatsApp.apk file that’s saved on your PC. The app will automatically install itself in Bluestacks App Player.
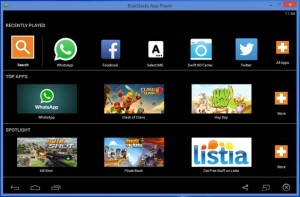
7. In Bluestacks, you’ll see a grid of apps you’ve installed. Find and launch WhatsApp.
8. Enter your phone number and click Verify.
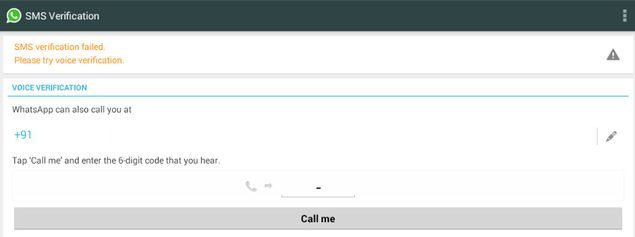
9. Now wait for 5 minutes as WhatsApp tries, and fails, to automatically verify using SMS.
10. After 5 minutes, WhatsApp will offer you an option for voice verification. Click Call me.

11. You’ll get a phone call. Answer it and you’ll hear the verification code being spoken in loop.
12. Enter the verification in WhatsApp (running in Bluestacks) and you’re good to go.
13. None of your existing contacts will show up in WhatsApp if you use this method. You can still reply to any messages you receive.
14. You can add contacts individually to WhatsApp by clicking on the three dots icon on the top-right > Contacts. Click the contact icon on the top-right, next to search. These contacts will be saved locally and will not show up on other devices. You can then start sending messages to these contacts as well.
15. Any groups you’re a part of will also not show up on the PC. You will have to ask the group admin to add you to the group again.
If you’re hoping to use WhatsApp on both your PC and your phone at the same time, you are out of luck. One phone number can be associated with only one device at a time – your phone will stop receiving WhatsApp messages when you’re using it on the desktop. Another limitation is that you can’t switch between the two devices instantly. WhatsApp imposes a 20-minute delay between two verification attempts (this delay keeps increasing with each verification attempt on the same day), so keep that in mind when setting it up on any device.
Did this help you install WhatsApp on a PC? Let us know via the comments. For more tutorials, visit our How to section.


